Home - Beauty
Top 10 Moisturizers for Mature Skin
01

Top 10 Moisturizers for Mature Skin

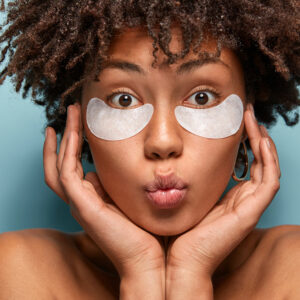
Mature skin can be described as wrinkled skin that is very thin and fragile. Since it appears like crepe paper, it is also called crepey skin. Our skin contains collagen and elastin, proteins that give it structure and form. Factors like exposure to the sun’s UV rays and aging break down these proteins quickly, leading to crepey skin. Our skin produces less collagen and elastin at 25, and crepey skin starts appearing at around 40. How to prevent mature or crepey skin? One cannot prevent age-related mature skin but can delay it with the right skincare tips. Mature or crepey skin commonly occurs on the upper arms, under the eyes, and around the neck and decollete due to prolonged sunlight exposure. Therefore, one must cover these areas by wearing full-sleeved clothing, sunglasses, and hats. Besides sun exposure, mature skin can result from reduced collagen and elastin production, pollution, stress, an unhealthy lifestyle, unhealthy food habits, and a poor skincare routine. One must learn about these risk factors and take the necessary steps to keep the skin healthy. If a person feels their skin is becoming crepey despite trying different remedies, or if they notice a sudden or quick change in the structure of their skin, it is advisable to consult a dermatologist. In addition to moisturizers, skin specialists may recommend laser treatment using radiofrequency or ultrasound devices or skin revitalization therapy to improve the skin’s quality and delay the formation of wrinkles. A combination of home skin care and FDA-approved procedures can help. Best moisturizers for mature skin While continuous and long-term use of moisturizers can help improve crepey skin considerably, one must choose the right brand and product. What one uses for regular skin may not work for mature skin, as this skin type requires creams and lotions with unique ingredients.
Read More
9 tips for concealing under eye bags and circles like a pro
02

9 tips for concealing under eye bags and circles like a pro

The eyes usually reveal a lot about a person’s emotions and well-being. So, they could easily represent signs of fatigue, stress, and aging, resulting in the dreaded under-eye bags and dark circles. Moreover, under-eye concerns may make even a well-rested person appear tired and worn out. Luckily, there are expert techniques to flawlessly conceal under-eye bags and circles. Here are nine tips to help one achieve a refreshed and rejuvenated appearance. Prepare and hydrate the skin The key to flawless makeup application, especially in the delicate under-eye area, is proper skin preparation. One should start by gently cleansing their face to remove any dirt, oils, or makeup residue. Afterward, they must apply a hydrating moisturizer to the entire face, paying extra attention to the under-eye area. When addressing under-eye bags and dark circles, a moisturizer infused with hyaluronic acid can be particularly beneficial. Hyaluronic acid helps plump and hydrate the skin, reducing the appearance of fine lines and creating a smooth canvas for makeup application. Choose the right concealer Selecting the right concealer is crucial when aiming to conceal under-eye bags and dark circles. The ideal concealer shade should be slightly lighter than the individual’s natural skin tone, helping to brighten the under-eye area. Creamy concealers with good coverage are typically preferred for this purpose. One must try to pick concealers with a peach or salmon undertone to neutralize the blue or purple hues often associated with dark circles.  Color-correct dark circles For those battling stubborn dark circles, color correction is one of the most important tips to effectively conceal under-eye bags. Selecting a color corrector with a red undertone helps neutralize the bluish or purplish hues associated with dark circles. One must gently dab the corrector onto the affected areas before applying concealer. This technique creates a balanced base, ensuring that the concealer effectively hides discoloration.
Read More
Dos and don’ts of hair coloring at home
03

Dos and don’ts of hair coloring at home

Coloring one’s hair can be a transformative experience, allowing individuals to express their style, enhance their natural beauty, or experiment with bold and vibrant shades. However, it is crucial to approach hair coloring with care, as mishaps can lead to severe hair damage and disappointing results. This comprehensive guide explores the dos and don’ts of coloring hair, providing valuable insights for anyone who wants to experiment with hair colors at home. What to do Here are a few things to do when choosing to color one’s hair at home: Consult a professional:  Before coloring one’s hair, it is wise to consult a professional hairstylist. They can assess the hair type and condition. Accordingly, one can discuss the desired outcome, and a professional can offer advice on the best approach. Choose the right shade:  Individuals should select a hair color that complements their skin tone, eye color, and personal style. A professional colorist can help one find the perfect shade for their complexion. Many online stores can help choose the right shade, and one of the popular choices amongst users is eSalon, which has detailed information on hair colors, shades, how-tos, and much more. Test for allergies: Always perform a patch test before applying any hair color. This helps identify potential allergic reactions or skin sensitivities to the products. Use high-quality products: Invest in quality hair coloring products and tools. Cheap or low-quality products may damage the hair and lead to uneven coloring. Prep the hair:  It is advisable to cleanse the hair thoroughly before coloring. Avoid using heavy conditioners or styling products that can create a barrier between the hair and the color, affecting the results. Follow instructions:  Read and follow the instructions provided with the hair color product carefully. Pay attention to mixing ratios, processing times, and application techniques.
Read More
15 popular ways to remove body and facial hair
04

15 popular ways to remove body and facial hair

In the pursuit of smooth, hair-free skin, one can explore various methods to remove unwanted body hair. It is essential to research and understand the hair removal options so individuals can tailor their choices based on preferences, pain tolerance, longevity, number of sessions required, and desired duration of results. Understanding the pros and cons of each method empowers individuals to make informed decisions, ensuring a smooth and personalized approach to the process. Shaving Shaving is a quick and affordable method for removing body hair. Individuals can easily trim hair at the surface using a sharp razor and lubricating shaving cream. Its benefits include immediate smoothness and minimal discomfort. However, regrowth is noticeable within a few days, and there’s a risk of cuts or irritation if not done carefully. Waxing Waxing involves applying hot or cold wax to the skin, pressing a waxing strip on the area to ensure the wax sticks to the hair, and then swiftly pulling it off, removing hair from the root. This method provides longer-lasting results compared to shaving, with regrowth appearing after several weeks. Regular waxing may lead to finer and sparser hair over time. While it can be uncomfortable, the benefits include smoother skin and reduced regrowth frequency. Hair removal creams Depilatory creams contain chemicals that break down hair structure, making it easy to wipe away. The method is painless, and the results are quick. Benefits include softer regrowth than shaving. However, it’s crucial to follow instructions to avoid skin irritation. Regular use may lead to longer intervals between hair removal sessions. Epilation Epilators are electronic devices that grasp and pull out multiple hairs simultaneously. While initially uncomfortable, regular use can lead to longer-lasting results compared to shaving. Epilators are versatile and can be used on various body parts. The benefits include smoother skin for an extended period, with regrowth becoming finer over time.
Read More
Pros and cons of laser hair removal devices
05

Pros and cons of laser hair removal devices

There are several ways to remove body hair, and laser hair removal devices are one of them. These devices involve using a beam of light through targeted areas to remove unwanted hair from different parts of the face and body. However, before opting for this technique, one should be aware of the pros and cons to know what to expect from the process. So, consult a specialist and learn about the device, process, and the potential results. The benefits of using laser hair removal methods Long-term solution Laser hair removal devices offer results that last longer than traditional methods, such as shaving or waxing. The method reduces hair growth by a significant margin, and several customers do not see regrowth for months or years. Hair that grows back might appear lighter in color and thinner. A treatment provider may recommend a relevant schedule to treat the individual’s hair type and usually book the appointments during the anagen or “growing” phase. Moreover, the process also requires less upkeep as compared to other hair removal methods. Those who shave to get rid of body hair have to do so every few days. Options like waxing or threading may last about four weeks, whereas laser hair removal treatments last much longer following the sessions carried out by the expert. No downtime involved Another benefit of laser hair removal devices is that they are non-invasive. While the process can leave the skin a little red and swollen for some time, one can return to their daily routine immediately after it. Despite the lack of downtime, one must remember that one must avoid stepping out in the sun or using tanning beds or sun lamps for a brief time following the procedure. Multiple treatable areas and easy-to-address complications Laser removal is a method that is used to eliminate hair in various areas of the body and face, including armpits, legs, hands, and delicate areas like the upper lip, bikini lines, cheeks, and chin.
Read More
8 tips for finding the right lip balm
06

8 tips for finding the right lip balm

The skin on the lips is delicate and sensitive. While tips like maintaining sufficient hydration and avoiding habits like nibbling on the lips help, there is more to lip care. Using lip balms regularly helps protect the lips from heat, dust, and pollutants. Along with focusing on moisturizing properties, one can pick products with tints or fragrances. With several products in the market, choosing a lip balm with the right ingredients is vital. Eight tips for finding the right lip balm Check the ingredients of a given lip balm One thing to do whenever one checks out a lip balm online or at a nearby store is to scan through each ingredient. Examining the ingredients helps buyers determine which component is beneficial for their personal needs (or is harmful). For example, a given ingredient may trigger allergic reactions in buyers. Some lip balms may also contain ingredients like menthol, which dry out the lips and cause one to repeatedly reapply the product. Also, certain ingredients are toxic for some users and could lead to severe conditions like mouth disorders and other problems. So, it is crucial to check the ingredients of a lip balm and ensure they are safe for use. Consider the fragrance and color Many lip balms have an added USP of great tints, flavors, and fragrances. While one may not think much about these aspects of the product, they are essential things to consider. Regarding color, buyers may want to buy balms that complement their skin and lip tone. Regarding scents, buyers may lean towards purchasing balms that do not have a strong and potentially offensive odor. Also, testing and trying lip balms with different colors or fragrances makes one’s lip care routine more enjoyable. One must ensure that the tints and fragrances added to the product do not have a harmful composition.
Read More
6 common mistakes to avoid while waxing at home
07

6 common mistakes to avoid while waxing at home

At-home hair removal is the go-to solution for many who want to save the time and money it takes to go to a salon. But, certain mistakes in the process not only result in a waste of time, money, and energy but also cause discomfort. For instance, while waxing at home, one needs to be patient and avoid rushing the process to prevent issues like missing patches of hair, ingrown hair, rashes, redness, and pain.  1. Skipping the patch test When waxing at home, if one is trying a new wax or all-in-one waxing strip, they should do a patch test. This will help one determine if the product is safe for their skin. All one has to do is apply the wax or use the strip on a tiny patch of skin and wait for 48 hours to see if the skin reacts to the product. If not, one can go on and use the product on their body. This simple trial allows one to avoid full-fledged allergic reactions. 2. Not prepping the skin Just grabbing the wax or wax strip and getting started without any prep is a big mistake to avoid. Prepping the skin can minimize discomfort in the process. If the wax is applied to greasy or dirty skin, it will be unable to stick to the hair. To avoid this issue, it is important to shower before the waxing session. A hot shower or bath is a better choice, as it will open up the skin pores, making it easy to get rid of body hair. But, one should ensure the skin is not wet before applying the wax. The skin could also become damp due to sweat, which can again make it difficult for the wax to stick to the hair. 3. Getting the timing wrong Planning waxing sessions ensures one leaves enough room between each session for the hair to grow.
Read More

Latest Articles

10 best laundry detergents and their features
Everything Else

10 best laundry detergents and their features

Detergents are available in multiple forms, such as pods, powder, and liquids, and choosing the best one can be tough. In addition to daily wear clothing and regular laundry items, you could have some garments that require specialized products for effective cleaning. Some members of your family might have sensitive skin and need mild chemical-free products. So here is a list of the best detergents that can make your laundry task hassle-free.  Gain Laundry Detergent Among the list of laundry detergents that are known for their fragrance is Gain Laundry Detergent. The liquid not only cleans your clothes but also gives them a delicate fragrance that can last for up to 6 weeks or until the garment is worn. This detergent can be used in all washing machines, including highly efficient ones. The detergent also has Oxi Boost, a combination of surfactants, enzymes, and pre-treaters that aid in eliminating stains and odors that could be two weeks old. Moreover, this product is available in multiple sizes to cater to the needs of every household. Persil ProClean Laundry Detergent Among the laundry detergents that excel in stain removal is Persil Proclean. This concentrated liquid offers deep cleaning and has stain-fighting enzymes. It has an active scent boost that eliminates the toughest of stains and odors so that your clothes have a fresh feel. This detergent has exceptional performance in all washing machines and provides effective cleaning at all water temperatures. The clean rinse formula and low suds ensure that white clothes stay white and bright clothes stay bright. Kirkland Laundry Detergent If you are looking for laundry detergents that are easy on your pocket, then choosing this Kirkland laundry detergent will be the best. The detergent offers a great combination of performance and cost-effectiveness. It has an ultra-clean formulation which enables it to travel deep in the fabrics to eliminate odor and stains.
Things to know about chronic kidney disease
Health

Things to know about chronic kidney disease

Chronic kidney disease   occurs when there is a gradual failure of kidney function due to illnesses, genetics, etc. The kidneys’ main role is to filter waste matter and flush out excess bodily fluids, but advanced kidney failure causes fluids, electrolytes, and waste to build up in the body. Various factors must be understood to manage the condition, including the causes, symptoms, prevention tips, and more. Read on to learn more about chronic kidney disease. Causes of chronic kidney disease The main causes of chronic kidney disease are as follows: Diabetes When the body’s sugar levels are too high and become unmanageable, bodily organs stop functioning as normal. The first to be affected are the kidneys, leading to diabetes, which, in turn, affects the nerves, eyes, and heart.   High blood pressure This is when blood pressure against the walls of the blood vessels increases, and can lead to chronic kidney disease, heart attacks, and strokes. Hence, chronic kidney disease can also be caused by uncontrolled high blood pressure.   Genetics Chronic kidney disease can also be passed down through the genes. Therefore if someone in your close family has the condition, it is likely to be passed down to you.   Autoimmune disease Lupus nephritis is an autoimmune disease that causes swelling of the small blood vessels, which are responsible for flushing waste out of the kidneys.  Birth disorder Sometimes, certain malfunctions of the kidneys develop in the mother’s womb and can cause infections and kidney damage later on in the person’s life.   Other causes Kidney stones or tumors can cause kidney damage or failure if not treated in time.  Glomerulonephritis It is a group of diseases that can cause inflammation in the filtering segments of the kidneys. This disorder is one of the most common types of kidney disease. Vesicoureteral reflux This is a condition that causes urine to back up into the kidneys.
Have these 14 foods to manage macular degeneration
Health

Have these 14 foods to manage macular degeneration

Macular degeneration is an eye condition that causes changes in the macula, leading to vision loss. Though there is no cure for this condition, following an eye-healthy meal plan is important in managing complications like vision loss. A nutritional regime for age-related macular degeneration should include healthy amounts of vitamins, minerals, and other nutrients. Some foods that contain eye-healthy vitamins that help manage symptoms of macular degeneration are listed below. Macular degeneration Age-related macular degeneration is a primary cause of vision loss among people aged 55 years and above. The condition refers to the deterioration of the central part of the retina called the macula. Symptoms include blurry vision, blind spots, difficulty recognizing faces, visual distortions, and more. Studies indicate that nearly 20 million people in the country live with some form of age-related macular degeneration. This condition occurs in two forms- the dry and the wet form. The dry type occurs when the macula gets thinner with age. This condition gradually progresses over the years. The dry form can advance into the wet type when abnormal blood vessels develop in the back of the eye and harm the macula. The wet type of AMD usually accelerates vision loss. Leafy green veggies Dark-green, leafy vegetables are rich in beta-carotene and carotenoids such as lutein and zeaxanthin. Including leafy vegetables such as spinach, kale, and collard greens in your meal plan can increase the pigment density in the macula and potentially slow down age-related macular degeneration (AMD). Also, keep up a healthy intake of cruciferous vegetables such as cauliflower, broccoli, and cabbage, all excellent sources of essential vitamins. Colorful vegetables Colorful vegetables such as carrots, red and yellow pepper, pumpkin, and tomato contain carotenoids that contain essential vitamins for the eyes, such as lutein and zeaxanthin. To manage macular degeneration, include all these colorful and eye-healthy veggies on your plate.